
The Journal can be installed and run on USB/flash drives. This provides a simple way for you to have The Journal available to you on just about any computer with Windows and a USB connector.
NOTE: You will need about 60 MB of free space on the USB/Flash drive to install and run The Journal.
Here’s how:
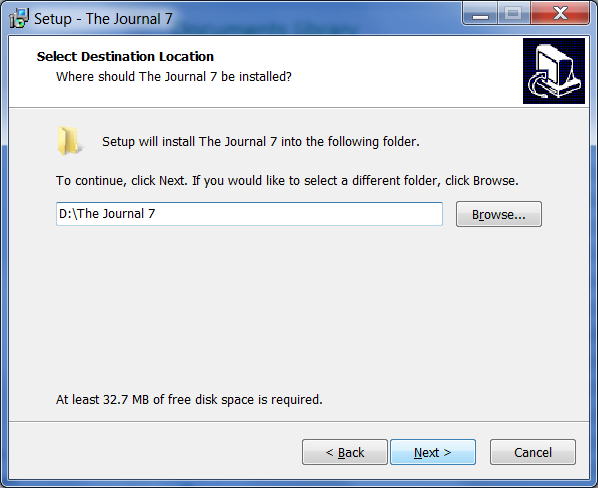
1. Install The Journal to the USB drive. You will need to override the default installation path. Type in the path or browse to the folder on the USB drive that you want to use.
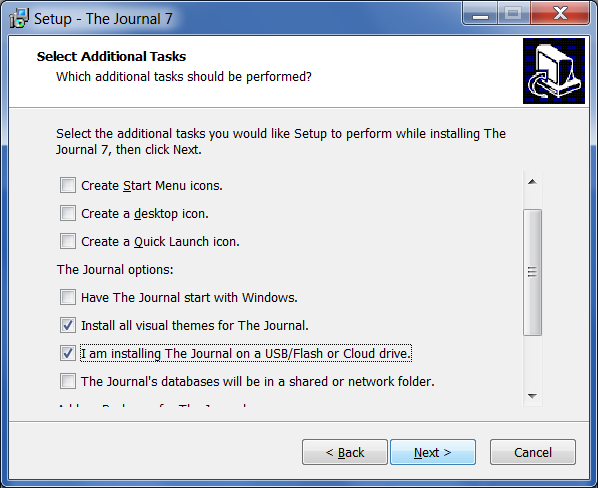
2. During the install, after you’ve typed in the path to the USB drive, you will next need to check the option:
- “I am installing The Journal on a USB/Flash drive.”
And *UN*-check these options:
- “Create Start Menu icons”
- “Create a desktop icon”
- “Create a Quick Launch icon”
- “Have The Journal start with Windows.”
3. After the install completes, use Windows Explorer to open the install folder (“The Journal 7” in this example) on your USB drive. Double-click on Journal7.exe to run The Journal.
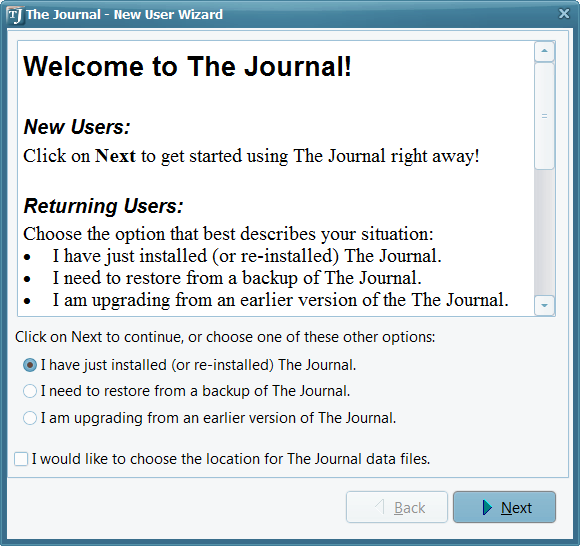
4. The first time you run The Journal on the USB drive, in the New User Wizard, check this option:
- “I have just installed (or re-installed) The Journal.”
Then click “Next”.
5. After you enter a password (or choose not to have one), click “Next”.
6. Click “Finish” and you’re done. 🙂
And that’s it, really. If you want to transfer an existing Journal Volume onto the USB drive, use The Journal’s backup and restore feature. Do the backup from the install of The Journal that you had before (the one on your computer’s main hard drive), and then do the restore from The Journal on the USB drive.